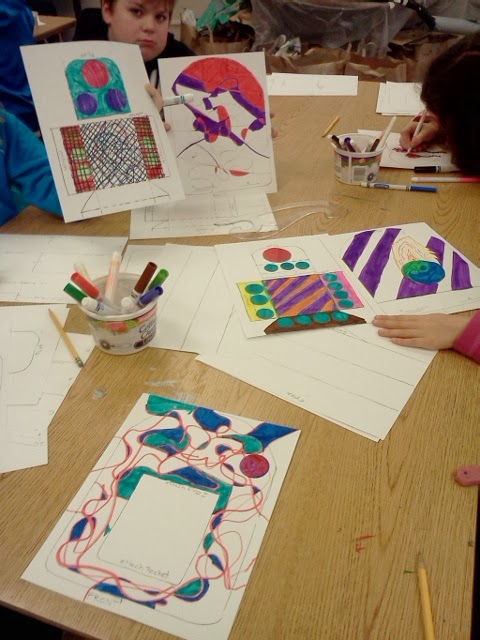
Students are currently 2/3rds of the way through their Plant Painting project. Originally it was a succulent or cacti painting - but technically there are some regular plants mixed in.
Again - the 4th graders began by observing and drawing the plants. Then they chose the ones they liked to feature in a developed painting. Now for the color theory part.
Students sketched out their composition and then were given primary colors but directed to begin by painting their whole background secondary colors (orange, purple, green). Any painting class will put clear skill parameters on an assignment.
After that they we permitted to paint their plants and pots however they chose.
Here are some in process. (They will get more detail in the next 2 weeks - but the color mixes are so beautiful at this stage).
pretty impressive - right?


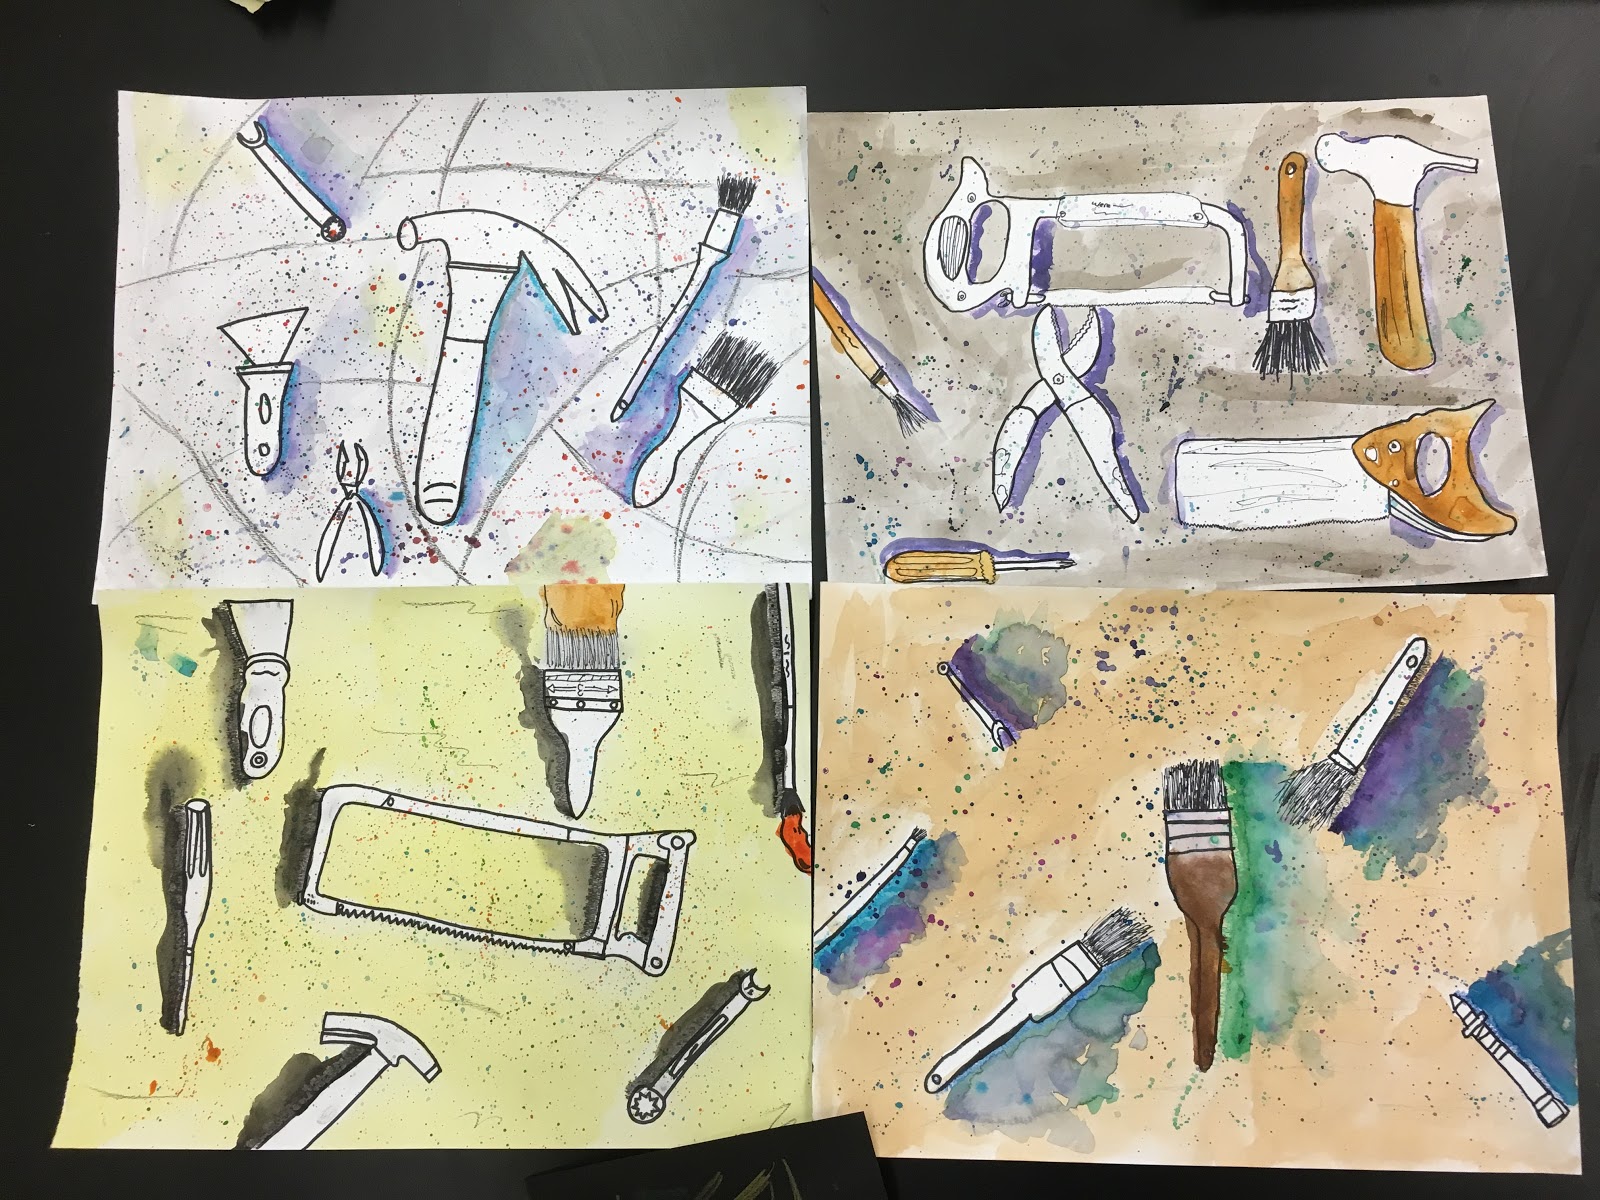
Below you will see some examples of the students' completed Jim Dine tool paintings. I know they loved the project - but I loved the project as well.
Every single student had success!!!!!
That is 100%- which is as good as it gets for an art teacher's heart!


11/14/19
4th grade-
We began the year looking at the illustrations of Lois Ehlert in “Cuckoo.”


My goal was for them to see the articulated bird in it’s simple semi-circle shapes as a hands-on lead-in
to the work of Charley Harper.
to the work of Charley Harper.
Students really enjoyed the simplicity of the Ehlert’s birds and they made a cheerful display
in the main hall.
in the main hall.
Charley Harper’s work

took some analysis to understand. His “minimal realism” illustrations of wildlife are constructed
using geometric shapes and french curves.
The students spent time tracing and then copying his work in order to “get” which shapes he used
for each image.
using geometric shapes and french curves.
The students spent time tracing and then copying his work in order to “get” which shapes he used
for each image.
After these couple layers of practice, students composed their own image of a favored creature,
using geometric shapes or templates.
This was a difficult assignment, and many were successful working within these parameters.
using geometric shapes or templates.
This was a difficult assignment, and many were successful working within these parameters.


I believe all the kids enjoyed the challenge! Some examples of their work is displayed in the main hall.


We are currently looking at the work of Jim Dine and his tool series.
In the last week students have been making realistic drawings directly looking at tools
(that I brought in from home). So far they are off to an enthusiastic start and are having fun
with this unique assignment.
In the last week students have been making realistic drawings directly looking at tools
(that I brought in from home). So far they are off to an enthusiastic start and are having fun
with this unique assignment.

They are a great group to work with.
Thank you,
Nancy Helmsworth
Instagram: capitolhillart
The fantastic Symbolic Self-Portraits are complete and will be displayed in the Capitol Hill Art Show - this thursday 4/11 - 6:30-8:00.
We have since moved on to one of my favorite projects
Kandinsky - Improvisation
Here is the slide show the kids see as an introduction to this prolific painter:
Kandinsky Slide Show
We are looking closer at the "Improvisation Gorge" and how he used this idea generating system to plan his paintings. He sketched in his sketchbook - then used the drawings as "shapes" to organize the picture plane.
Our process is for students to make their own improvisational painting -
brainstorming words to use in a mad-lib kind of sentence

taking those objects in the sentence to use as structures within own composition
test 2x compositional ideas
decide
add "zippered" oil pastel color to practice blending and transitioning of color
Have FUN-
This is a fun process and the outcome is always silly and entertaining - and gives a real glimpse into the minds of a 4th grader!
2/5/29
Symbolic Self-Portraits are coming along.
Argh...though a snow day is fun, Tuesday is art day for 4th graders...so another delay.
:(
11/6/18
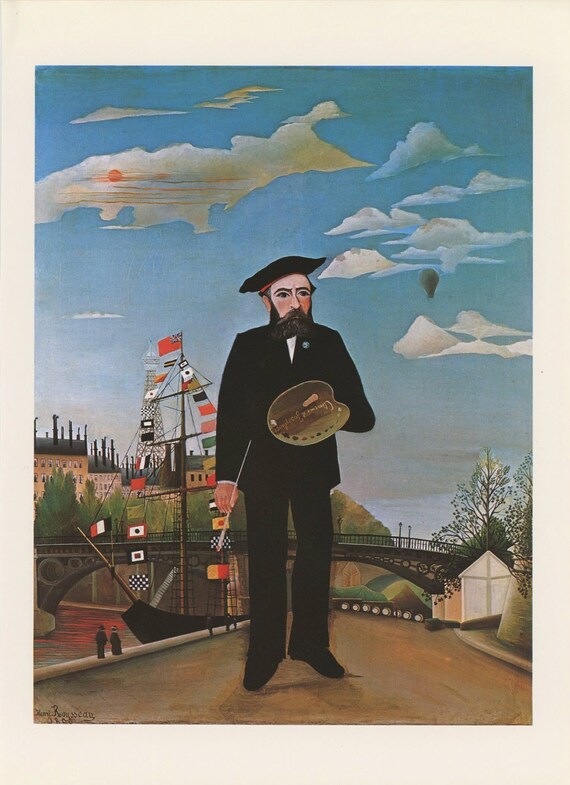
We are slowly moving towards the full body self-portraits inspired by the self-portraits of Frida Kahlo, and Henri Rousseau.
We began talking about Frida Kahlo today as students spent time signing and adding color to their action figure prints. The goal of the lesson was to give the kids hands-on experience posing the figure bending at the correct joints, to show action.
Here is some of their work.


Fourth graders began the year with a self-portrait. As our supply order had yet to arrive, I was motivated to use some of last year's scraps. I had some pieces of nice water color paper that were begging for a new purpose. Perfect - necessity is the mother of invention...
Students learned some zentangle patterning and used that in a split-apart and then reassembled self-portrait.

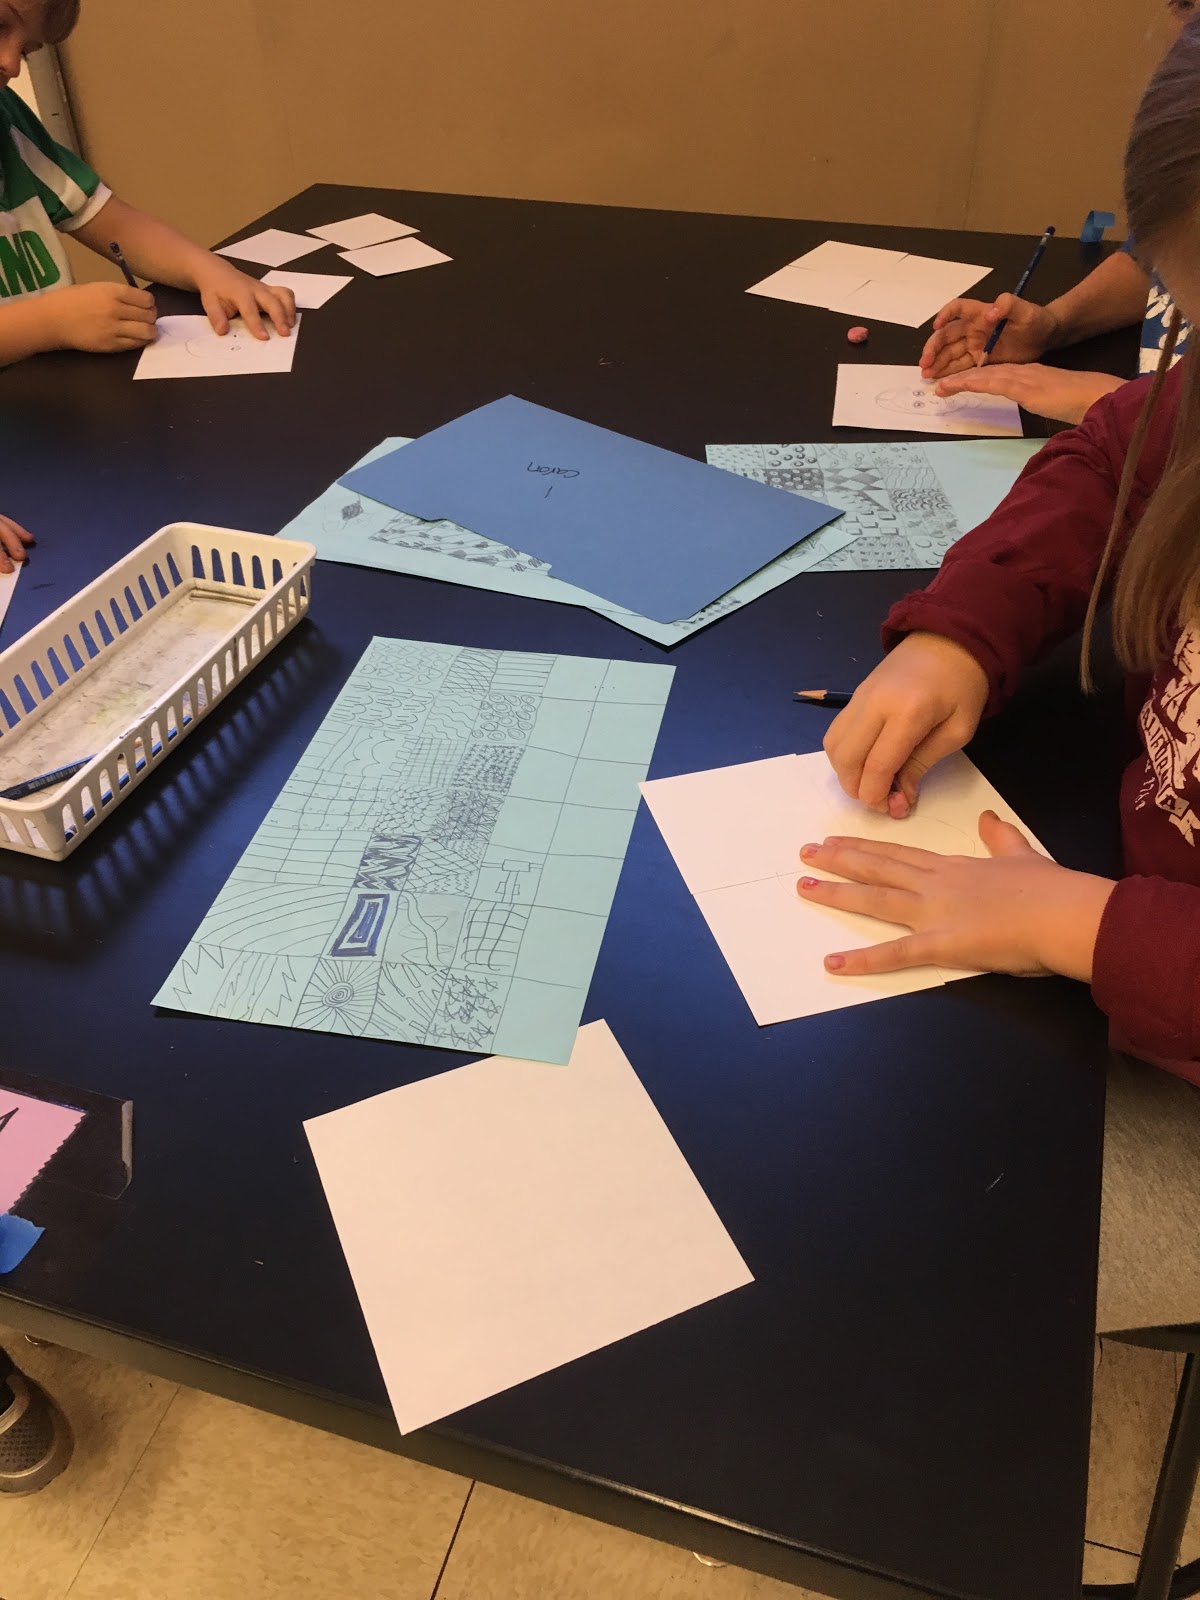
I explained that sometimes artists play mind games with themselves to trick them into being more creative or trying new ideas. Only looking at part of the art at a time is one way to disorient oneself. This is a creative technique.
The fourth graders were encouraged to work the same way and then reassemble their portraits.


4/1/18
Plan to enjoy the fantastic Cacti Paintings on display at the Art Show. Students did a wonderful job observing the cacti and then making their own compositional decisions as they arranged them in their paintings. I say paintings plural as they made 2 paintings with 2 different approaches. Different media allows for different skills to shine through.
Originally, the goal was to have students get a chance to work on their color theory- which is another way to say "color mixing" skills. They were offered just the primary colors to begin with and encouraged to paint their backgrounds with a secondary color they mixed.
Also the 4th graders had the chance to practice how a painting is "built" from the background to the foreground. They were offered some helpful step by step hints, but as you will see in the show, they definitely (and as usual) took their painting in the direction of their own choice.
Tempera paint is good for painting solid forms, with some tints (highlights) and shades (shadows), but not so good for fine details. Once I saw how great their original drawings were and the creative compositions, I encouraged them to do a different version of their cacti, with lots of drawn detail and a thin color using transparent watercolor.
Again - great job. My only regret is that I didn't read a book about what a great home the cacti can be:
https://books.google.com/books/about/Cactus_Hotel.html?id=QbEB1Wg6cz8C&printsec=frontcover&source=kp_read_button#v=onepage&q&f=false
I'll put that in my notes for next time.


1/21/18
The large self-portraits are complete and on display in the halls.
We have moved on to a simpler project, the subject is cacti and the medium is tempera paint. I was noticing the students have not painted much in the past few years as the class period was too short. Now that our time is longer, we have time to tackle the mess - set-up and clean-up of paint.
Cacti are really fun and pretty easy to draw as well.
This is the first time I have done this project, so I am curious about how it will turn out...BUT I am quite optimistic and the plan is to show these are the CH Art Show.


See what I mean?
11/30/17
4th grade students have been working on their traditional full body "Symbolic Self-Portrait" inspired by the artists Frida Kahlo and Henri Rousseau.
Frida Kahlo and Henri Rousseau -slide show
Students have had a variety of ways to practice drawing a figure with correct proportions. I know they have told you about "Bendable Bob." ;)
Also they have sketched the wooden mannequins and even took a detour by making an action figure print (with the sneaky goal of giving them yet another medium to practice their understanding of the human figure).
 | |||||||
| These figures were cut and reassembled to make an action figure "print" |


4th graders have taken every challenge and task with full enthusiasm and no doubt will end up with very fine projects. At this point, all students are working on their large final portrait - which will go quickly as all the composing and planning has already been completed.
Time now for straight production!
2/8/17
Students have been thinking about the work of Gabriel Dawe and making string art!
OMG what could be better?
 |
http://www.gabrieldawe.com/ |

Really I would like to talk more about how the colors overlap and recombine to make new ones, but sometimes less talk and more action is what is needed.


11/2/16
The large Symbolic Self-Portraits are getting completed this week and next.
:)


10/3/16
Students have been working hard planning their own Symbolic Self-Portrait. They have practiced drawing a figure with correct head to toe proportions and now are trying to combine their new skills and new ideas. They are challenged to show at least 3 symbols or objects that tell about themselves - their interests, their family, their past.
Here they are at work planning.


9/15/16
We are in our 2nd week of art classes and are off to a fun start. Students have begun prepping for their "Symbolic Self-Portrait" inspired by the work of Frida Kahlo and Henri Rousseau. 4th graders will get a lesson and some practice time to learn how to draw more realistic body proportions and then they will proceed to plan and execute their own head to toe self portrait, including at least 3 symbols or clues about personal interests or history.
These are the works we have used for inspiration:
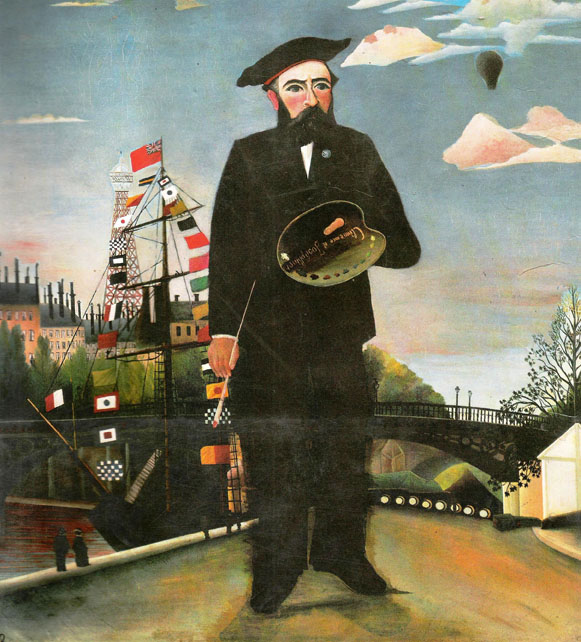 | |||
| Henri Rousseau - self-portrait |
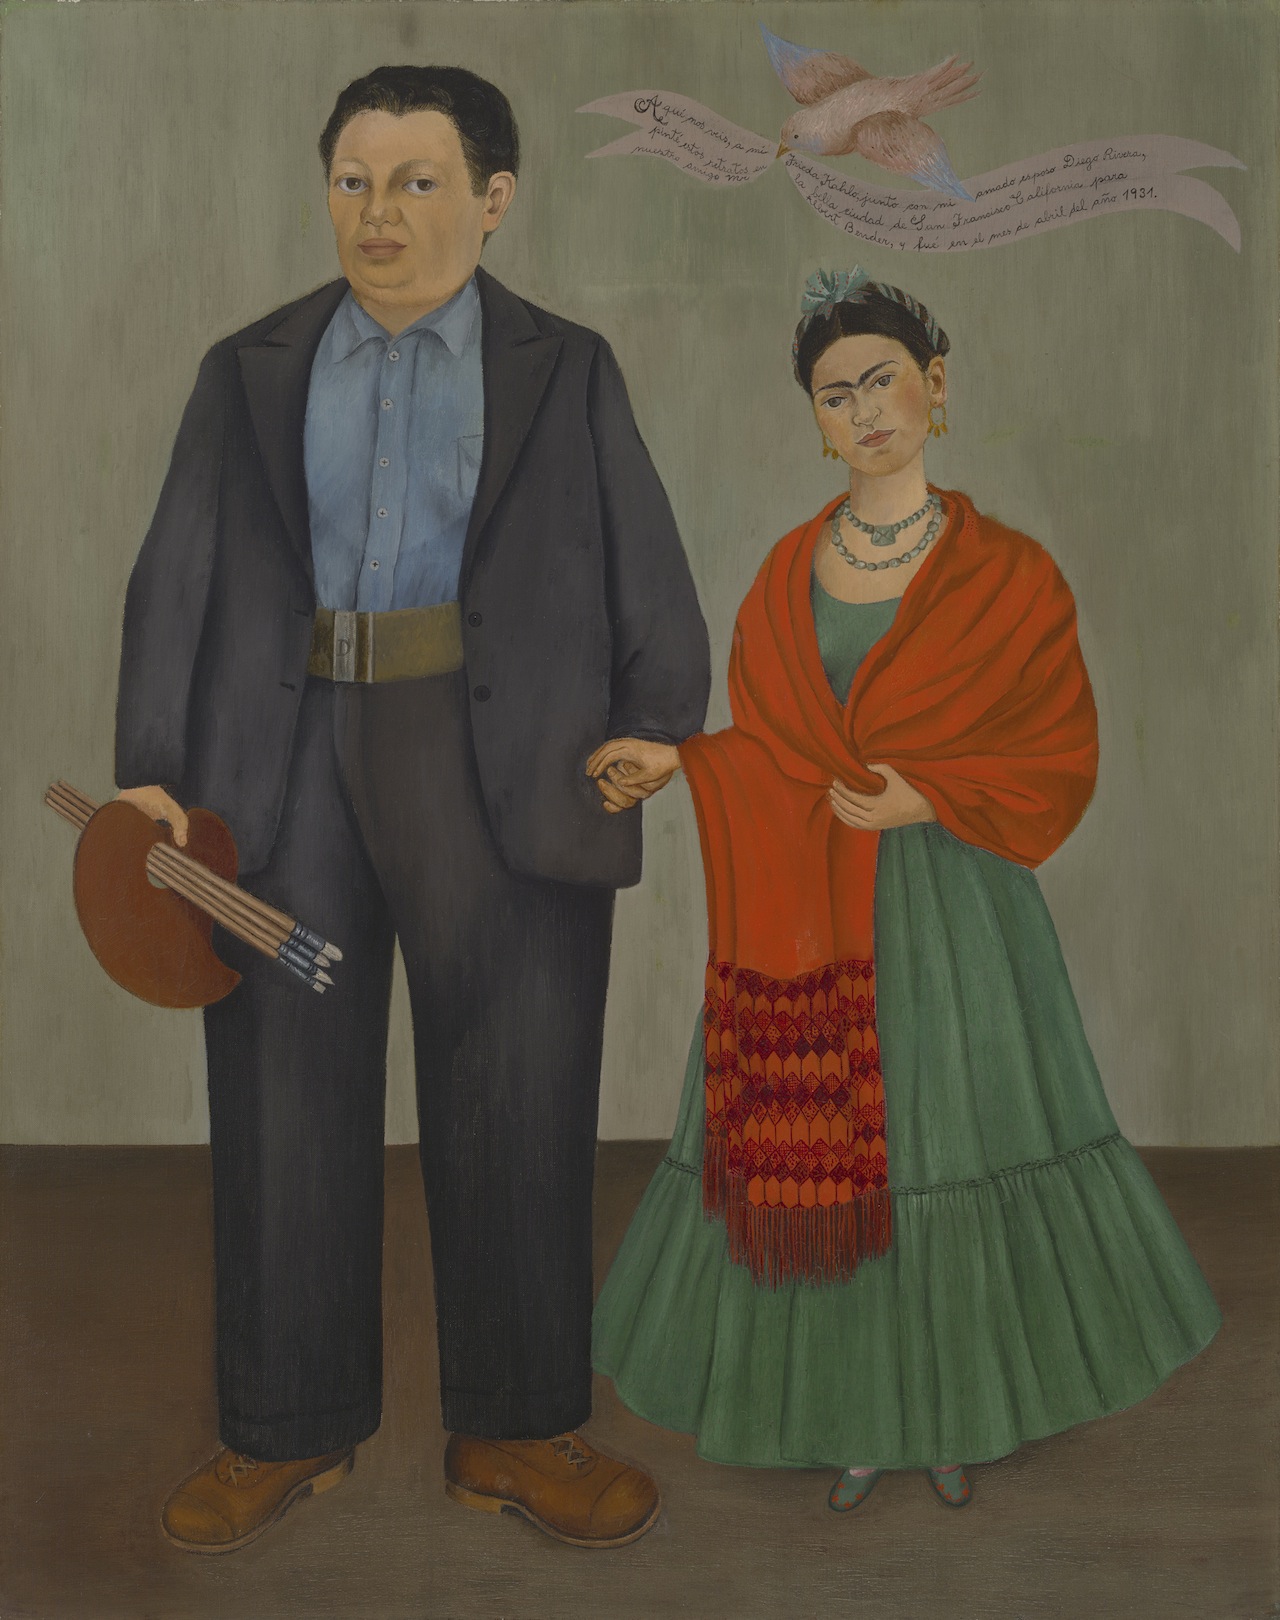 | |
| Frida Kahlo- self portrait, marriage to Diego Rivera |
5/15/2016
BACKPACKS are complete!
Challenging.


3/27/16
The 3/4 blend as a stand alone class is a nice place to try out new lessons. I get to work out the bugs with only one group.
A few years ago I saw a show at the American Folk Art Museum in NYC featuring the drawings of Martin Ramirez. He was a self-taught artist, Mexican living in America, who did these amazing, obsessive drawings with lots of parallel lines. I wanted to figure out how to share his work with students, so this was my chance.

Here is a link to a story of his work.
http://www.npr.org/new-postage-stamps-recognize-the-genius-of-martin-ramirez
I wanted the students to have some empathy about Ramirez' horrible life situation and we questioned what was really happening for him and how he felt. Regardless of all of the circumstances, the students seemed to connect to his work and enjoy it.
Here are some examples of their working in the "style of Ramirez."


2/8/16
A few of the completed "Improvisations"
I think they are gorgeous.


1/25/16
Wassily Kandinsky - "Improvisation Gorge"

One of my favorite lessons is this one inspired by the painting and creative process of Kandinsky.
Students learn about Kandinsky and the process of improvisation and how he used it.
Kandinsky -history, process
Students then make their own improvisational sentence as a way to organize the objects they will include in their own painting.
They are then given the challenge of composing their objects abstractly, as just shapes to become a starting point for their use of color. This is a big jump, to abandon the notion of illustrating their ridiculous sentence, to using their objects as forms in a composition.
Students are given a further challenge of using oil pastel and "zippering" together the colors as a way to transition from color to color. Artists use the word, feathering and blending for a gradual transition.
This task is easier and lots of fun as it looks really fancy.
The results are frequently dazzling and I expect no less for this group. The plan is to have this work in the Capitol Hill Art Show- which is the first Friday after spring break. Save the date.


12/12/15
Sadly there is so much bad news recently, but a few weeks ago my 4th graders were talking about the attack in Paris and the cancellation of a soccer match, for fear of safety. These particular students are soccer fans. Anyway, I had just heard a report on the news about a French art teacher, teaching Guernica as a way to talk about the tragedy in France.
Hmmm
Then I got this great news feed about protest/peace graffiti in Paris and there was a lull in our lessons....so I put together a simple power point about "Peace" in art.
"Art is about ideas - not just beauty, and sometimes it is about politics, and protesting violence and war."
There are many examples in art to reference, but we kept it simple.
peace pp
The students were given the opportunity to make there own drawing/painting about peace.
Here are a few of them. They seemed to really enjoy the activity.
PEACE to all!


11/21/15
Here are a few of the GREAT Symbolic Self-Portraits. these are on poster sized paper.


10/17/15
Symbolic Self-Portrait
The concept of symbolism is essential to visual arts. How does one communicate using images that refer to something else.
Students are learning about correct body proportions of figure drawing with the objective of mastering this skill so they can do a full body symbolic self-portrait. They are to show at least 3 things about themselves along with the portrait. The 3 things are clues to be included about their family, interests, skills....
We began by working on basic figure drawing with "Bendable Bob" and sketching from the art mannequins.
Ms. Gary's class has taken a side track as they are a 3/4 blend. They took time and sketched a portrait of Ms. Gary as she came and posed for her class.


All of the students looked at the symbolic self-portraits of Frida Kahlo and later, Henri Rousseau to broaden the cultural context.
Frida Kahlo's painting
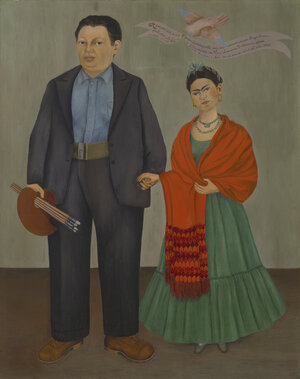
Henri Rousseau
Student work in process:

10/1/15
Jasper Johns - American Pop artist
Students began the year looking at the work of Jasper Johns and took inspiration from his work to create their own mixed media piece.
They looked at his painting that uses a grid structure of numbers in a series...

and set their own grid and series of numbers (relevant to themselves) and "responded" with the colors and shapes.
They were given a certain recipe of using a certain amount of cut paper, and coloring the positive or negative area of each cell. New oil pastels were brought out and the students, as you might expect, did a great job.


6/3
Kandinsky Improvisation
Wassily Kandinsky, a Russian painter in the early 1900's is a fun artist to study. Early in his career he was a "fauve" using emotional exaggerated colors. As his work progressed, he because more abstract in his use of color, and color became the point of his work. Later his paintings became very stylized and geometric.
We looked at one of his "improvisations" where you can see the objects in the drawings from his sketchbook, taken as shapes and re-composed to provide the structure/skeleton of his painting. When he went to paint it, he just responded using color.

Students were shown a creative process in which they "improvised" a sentence of random objects. They took the random objects and composed them in a topsy turvy way and added color abstractly.
Students were also shown or reminded how to use oil pastel and "zipper" the colors together to blend them.
This year's 4th graders did a GREAT job! Really they are beautiful, so I figured I had better post some of them.
Enjoy:


5/10/15
Some completed backpacks.


4/12/15


Backpacks!
Students have been looking at and thinking about backpacks for awhile now. They, have observed the features in their own backpack, had a little opportunity to draw an "invented" backpack - on which anything is possible and now are moving on to constructing a 3-D backpack of their own.
Backpacks have been around since the beginning of time, so if one stops to think about the continuity and universality of them, they are an amazing object to use as a focus.
The educational goal is to:
1. introduce the students to the concept of product design*
2. give them practice in working, thinking and planning a 3-D object
3. raise their awareness of objects that they use daily and have never stopped to consider in design, manufacturing or function.
4. plan and color repeating pattern- fabric design
5. have an opportunity to do some paper engineering
6. understand the component pieces of a backpack, so they can sew their own (learned from the Ugly Doll project), if they so desire.
*


3/3/15
Students have just about completed their sewing project of "Ugly Dolls."
They did a great job learning a new skill and thanks to the many Grandmothers out there who already taught their grandsons or daughters how to sew. It was my job to help the remaining students.
4th graders were asked to design their own doll and after constructing it, name it and write a short but clever biography about it.
I think the main display of these will be at the Capitol Hill Art Show, which is scheduled for May 1st.
Here is a snippet of what has been accomplished.
(backpack design - next!)


1/14/15
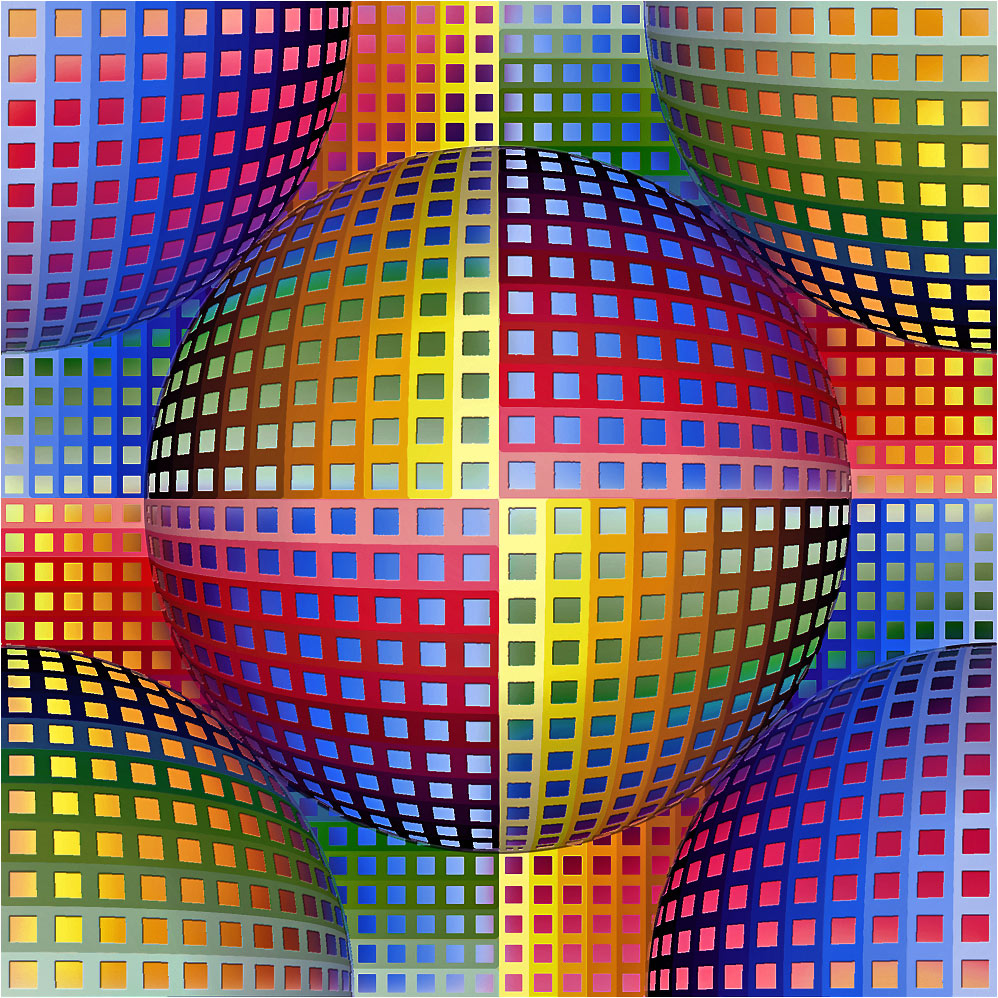
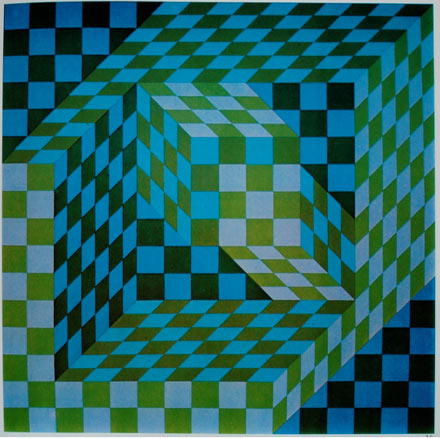
More Vasarely skills.
 |
| checkerboard + sphere |
 |
| Tumbling blocks |
1/8/15
Here are a few of the first Vasarely exercise.


1/5/15
Victor Vasarely
Students are having a quick lesson about Victor Vasarely. Not quick because I don't think he is important, but quick, because there is so little time to share all the ideas I would like to share with the students.
I am writing about the development about this lesson on the main page of the blog, hoping to share some insight into my thinking as their teacher.
Here are a few of Vasarely's famous paintings:

12/9/14
Here are some more of the completed collographs.
The students did a great job with this new medium.


12/1/14
Printmaking
Students have spent the last several weeks learning how to make a collograph. A collograph is a relief print with a matrix or plate that is made of mixed media objects. Students use tag board to build up their matrix dimensionally.
I like to have the students use white ink on a dark paper, and make a snow scene, then they can also use the liquid glue to draw on snow.
We read a book entitled "The Snow Globe Family," to put everyone in the mood for a winter scene and then they began designing.
The printing process itself is tricky, so it takes a few tries to learn to control the ink and printing pressure.
Here are some of the results. They turned out well.


10/24/14
Owls - Back by popular demand!


Making a painting of an Owl is a 4th grade tradition at Capitol Hill School and it continues.
Students began the lesson learning how to draw owls realistically.

They then had a quick lesson focusing on representing feathers with texture/patterns.
We looked at the painting "Roosters" by Ito Jakuchu. Painted in the late 1700's in Japan!

Students observed how he rendered feathers and then made a line-only drawing of an owl, full of patterning.
Here are some of their work.


Lastly, here are some of the beginnings of their final owl paintings.


9/4/14
A self-portrait learning how to draw a figure in correct proportions, will be our first large project.
In our first meeting students did a pre-test- "draw a standing figure, a person, the best you know how."
It is helpful for them to see what they know and later to compare with what they learn.
Then they meet "Bendable Bob," something I have developed over the years to teach students basic body proportions.

I'll post some before and after drawings.
We are on our way to planning a "symbolic self portrait," a head to toe self-portrait, that includes 3 clues about us. Some of the examples we will be viewing are:
a self-portrait by Henri Rousseau

If you are interested, here is some more information.
Henri Rousseau
Students will be coming to art once/week alternating with twice/week. Each class period will be 60 minutes. This is a little more than last year and with more sessions. I think we will have a productive and fun year.
NH
4/24/14
Here are the paintings in process.
Looking good.


4/12/14

Sonia Delaunay was a french Cubist, futurist and some other smaller schisms. She was Ukranian by birth and married Robert Delaunay the french Cubist painter.
"Electrical Prisms" is her response to the electric streetlights installed in Paris in the early 1900's. The world was changing quickly with the industrial revolution and artists who called themselves Futurists were trying to capture the feeling of kinetic movement during and of the change. It is a challenge to try to explain to 4th graders how electric streetlights were a new thing, how can they imagine that? but we try to get our heads around the idea of a changing world.
After this brief history and analysis, students are given free reign to design a non-objective, non-representational piece of art. They use templates for circles, french curves and rulers to compose a balanced picture.
Next they will be given the opportunity to paint their picture, mixing colors from the primaries, red, yellow and blue. They haven't painted much, so this in itself with be fun and open-ended.
I'll talk about how to control the paint and painters rule of using every color in at least 3 places, and they are often placed in triangular formation.....
Here are how some students started out:


4/1/14
Done with backpacks!
Sure wish I could find a place to display them, out in the community.
Any ideas or connections?

3/1814
Many student have completed their backpacks.
One more class is needed and then we will move on to something new.
Great work all around!


3/11/14
Many students began assembling their backpacks. Next week is needed for sure, but here are some pictures showing how it is going.


3/5/14
Students will now use card stock to create a backpack model of their own. The first step is to get color on all the surfaces. They were given the choice of watercolor, markers, oil pastel or any combination there of.
They are off to a good start.


The assembling step will be trickier as they will try to use glue. I practiced the project over the weekend and believe I have some helpful suggestions to make this as easy as it can be.
Students seem very excited and I am quite please with their efforts and ideas.


2/25/14
Backpack update:
Yesterday students made a 3-D model of a backpack, from a paper pattern.
I wanted them to better understand how a Backpack was made. They worked with partners and even though the assignment was quite difficult, they did a great job! Really.


Next they are excited about making their own backpack, using the same pattern as a starting point, while having a chance to add features, colors and details.
I even shared the history of the zipper because it has become such an integral part of contemporary backpack design and function.
zipper history
http://www.ykk-usa.com/
Backpacks continued:
I am a little behind on writing up what we have been doing.
A couple weeks ago, students spent time brainstorming the backpack of their dreams/ or a backpack of the future. Anything is possible.
Students want a jet-pack (hey we have wanted those since I was a kid!), time machine to help when students are late to school, a homework-doer, entertainment system, automatic umbrella, air conditioner, heater, food dispenser, transforms into a motorcycle, defends against bullies.....on and on.
Then they were charged with diagraming and illustrating their invention.
Here are some examples of their expansive ideas:


2/1/14
Backpack Unit - why and 1st project:
Backpacks:
This year this Unit has been expanded to include a discussion of product design, an occupation that employs many Portlanders.
At the beginning of the year I reached out to Nike and more recently to Columbia Sportswear in an effort to learn more about product design and how to accurately introduce the concept to the students. Both companies granted me access to a tour and/or discussion with an expert. Thank you to them.
Backpacks have been around since the beginning of time when the cavemen needed to carry something heavy but still wanted their hands to be free. It was not until the 1950’s that Kelty redesigned backpacking packs with aluminum frames and made them more comfortable to carry for miles into the back country.
More relevant, most students in our schools carry backpacks and the style has become more sophisticated as the market has become competitive. There are all kinds of pockets and straps and padding to make the pack comfortable, and suited to carry water bottles, keys, pencils, ipods, laptops as well as piles of heavy books.
There are zippers and pockets everywhere and I wanted the students to understand that someone, some designer somewhere made a decision (had an argument!) about where to put each zipper and what color the strapping and shape of the zipper pull should be. The logo and its placement is a whole other important discussion and area of product design.
My goal is for students to become aware of the fact that designers, arts people make those decisions plus at this time in commercial manufacturing history, nothing is random, every decision is a blend of function, design aesthetic and cost. Some things are cool, but cost to much to manufacture, its a balance.
Students began this Unit by examining backpacks and noticing the features and how backpack designs are different than each other. For instance, one is made to carry a skateboard, one is made to convert to panniers for a bicycle, another is made to carry a soccer ball.
Students sketched their backpack with attention to all the structural detail of zippers, pockets and straps. They are turning their drawing into a final art piece by adding color, imaginary or realistic.
They are wonderful and complete. Here are a few of the fantastic paintings.


In process:


1/21/14
BACKPACKS!

Students have been introduced to the idea of product design and how manufacturing employs artists and designers to design stuff we all use. Backpacks is our focus. All students use them, they have been around ever since humans needed to carry something heavy and wanted their arms and hands free (think caveman...but I can't prove it).
Students drew their backpacks as a study to notice all the technical features and now are taking a creative aside, to color their drawing/paintings however they want.
The work is quite good. Here is today's work in progress.
(next students will be doing a design activity on the same subject)

1/5/14
I really enjoyed being the assistant to the artist in residence for the 4th grade mask project. Students did great work and should be proud to the results. Here are a few pictures I took of the process.


11/25/13
Looking at the work of Jasper Johns is the perfect short project for the time before the Thanksgiving break. It gives students a chance to do something nonrepresentational and for me to introduce them to the idea of how artist sometimes use a “system,” a structure, a skeleton framework as a start to an non-representational work. We looked at his painting 0-9 and talked about pop art and the appreciation of the design of the mundane and then they were set loose.

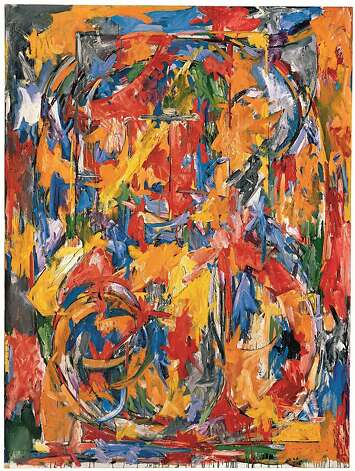

Their directions were to create a grid format and to put one letter or numeral in each “cell.” Their choice of number or letter was up to them and could have personal or random meaning. The results are colorful!


11/19/13
Some completed Owls paintings:
Admire and enjoy.


10/22/13
Owls
Students are starting their final painting of an owl.
They have gone through several steps of preparation, from doing several drawing -studies of owls, to making "thumbnail sketches" to decide upon their composition, to considering color theory for their painting palette.
The work they were doing today was WONDERFUL. Here are some shots of was is in process.
Enjoy the Owl Show!


10/19/13
OWLS
Mrs. Matsuo has generously shared her resources with the art class, so students will be able to draw and paint their Owl studies in class. I appreciate connecting with the classroom study. The experts from the Audubon Society visited and gave the students a good introduction about owls. Students arrived knowing lots of facts to support their observations of the physical attributes of the owl.
Drawings have been made and now students are planning their compositions and beginning to make their final drawing/painting. Tuesdays are our work days together.
10/4/13
Here are completed examples of the 4th graders "Rizzi" style self portraits. Students took to this like fish to water and in my opinion, did a wonderful job!
.jpg)


4th graders come to art 1x/week for 1.5 hour (a little less). We have a big work period and are getting a couple parts of a project completed each session.
They too began with a self-portrait, drawn with correct proportions and drawn simply. 4th graders are coloring it fully with oil pastel, so the color is dense and rich. Tuesday we looked at the art of James Rizzi, a pop artist who is somewhat cartoonish and made paintings with the objects in the foreground popping out, 3-D. His backgrounds are full of detail but it is all fairly uniform in size and evenly spaced. No overlapping objects.


Students drew, colored and cut out their faces to eventually pop-up from their background. Now they are designing their zany background and when complete, we will assemble it all in layers. They too are doing a very good job, I think the results are going to be lively and strong.
No comments:
Post a Comment